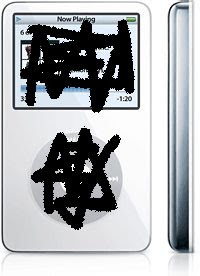
 I've just spent the best part of two days trying to revive an ipod from a fate worse than death.....ie/ Freya !!!
It all started with a Sharpie Pen... you know the ones which are impossible to remove from anything and everything ? Well Freya got hold of one..... a lovely black one.... and after she wrote all over the lovely white wall next to my office, she saw her masterpiece and thought why stop there ? She then started on the lovely white Ipod, she wrote all over the screen and click wheel.... fortunately Sharpie pens are not as indelible as they claim to be.. and also fortunate for me that I had a rubber protective case over the ipod, otherwise she would have coloured the whole thing in black.... but she was VERY pleased with her artistic streak :) ... There was only one thing for it !!
Step one :- remove Sharpie Pen scribblings with wet wipes.... it all came off bar a little bit on the click wheel.... phew !! (and now that's gone as well.... it does make you wonder what they put in those wet wipes ??) .....
Step Two :- power up Ipod
Step Three:- stare in disbelief as Ipod has a monumental hissy fit..... and promptly shuts down after a horrendous clicking sound.....
Step Four :- Start Ipod up .... watch it shutdown again chirping merrily as it goes
Step Five :- Connect Ipod to PC and watch as Itunes completely wipes out all the songs and films it contains.... stating very dead pan that ......"your NEW Ipod is ready for use."... (it wasn't by the way ... it was VERY broken)
Step Six:- Start it up again and swear profusely at white doorstop as it displays everything in Chinese....or possibly Mandarin...... Gotta love technology
After much scratching of my head I realised that it had had what amounted to a monumental brain fart and consequently thought it was connected to an Apple computer which probably accounted for the HFS+ file system I could see on the Ipod thank God for Mac Drive Software !!! which is free thankfully.... for a 7 day trial at least..... it's back in the land of the living...(I think) after creating a vanilla VMware virtual machine running XP on my XP system (go figure !! my copy of XP refuses to even acknowledge an IPod has been plugged in !!) and fooling it into thinking it wasn't a doorstop but an Ipod ......but it wouldn't surprise me if Freya used it to hammer something into the wall... watch this space for Ipod obituaries in the near future.....
For anybody else out there suffering the same problem I have an INF file which I've created which can drag your Ipod 5G back from certain death ;¬) and the magic numbers and letters are USB\VID_05AC&PID_1209\000A2700162D7F32 .....
addendum:- I've fixed my PC not recognising the Ipod.... it involved a fresh copy of USBSTOR.INF file and the USBSTOR.SYS file being placed in the C:\Windows\Inf directory you'll have to un-hide the directory with explorer under tools/folder options.... how they got hosed during all of this is beyond me... Anyway it's 1:41am in the morning and I'm chin strapped .... but I have a happily syncing Ipod sitting next to me :)
double addendum :- iPod Diagnostic Mode
Not many people know about this, but I am going to share it with you how to boot your Ipod into diagnostic mode :)
Steps:
1. You need to restart your iPod before putting it into Diagnostic Mode. Check that your hold switch is off by sliding the switch away from the headphone jack. Toggle it on and off to be safe.
2. Press and hold the following combination of buttons buttons simultaneously for approximately 10 seconds to reset the iPod.
* Original iPod 1G to 3G: "Menu" and "Play/Pause"
* All newer iPods, including 4G, 5G,Video, Classic, Nano, and Mini: "Menu(top button)" and "Select(centre button)"
3. The Apple logo will appear and you should feel the hard drive spinning up. Immediately press and hold the following sequence of buttons:
* iPod 1G to 3G: "REW", "FFW" and "Select"
* All newer iPods, including 4G Video, Classic, Nano, and Mini: "Back" and "Select"
You will hear an audible chirp sound (3G models and higher) and the Apple logo should appear backwards (older iPods). You are now in Diagnostic Mode.
4. Navigate the list of tests using "REW" and "FFW" on older models, or using the scroll wheel on newer ones.
Once you are in the Diagnostic Mode, use the "Forward" (>>) and "Previous" (<<) buttons, or scroll wheel on newer iPods, to navigate the menu. Each thing you see on the list is a certain test that can be done. To start a test, press "Select". To exit a test, press the "Play/Pause" (>||) button. For more information of the details of this menu......... happy testing :)

No comments:
Post a Comment